Top Content Title
This is an additional section to be able to add content
Helmet & Skates Purchasing Tips
Skaters joining our CanSkate or Pre-CanSkate programs should have the following equipment:
1. CSA Approved Helmet (see guidelines below)
2. Proper fitting Figure or Hockey Skates. NO Plastic or Adjustable Skates (see guidelines below)
3. Proper clothing - layers are best. We do not recommend snow suits. Consider Long Johns with Jogging Pants and a light waterproof pants over top and a thermal shirt with a long sleeved t-shirt and sweater for the top.
4. Gloves or Mittens
Helmet Guidlines
CSA approved hockey helmets are mandatory for ALL CanSkate and Pre-CanSkate skaters
- The helmet fit should be snug
- Hair should not be in a ponytail under the helmet...this interferes with the proper fit
- Full Face Masks are recommended due to Covid-19! Masks/Cages are highly recommended for 1st time skaters. They can be removed as the skater becomes more comfortable on the ice and able to control their fall.
- Both the strap and the helmet should be adjustable
- Stickers should not be put on the helmet
Bike, Ski and other types of helmet are NOT acceptable. Skaters will be prohibited from joining classes until proper protective gear is worn.
How to Purchase Skates
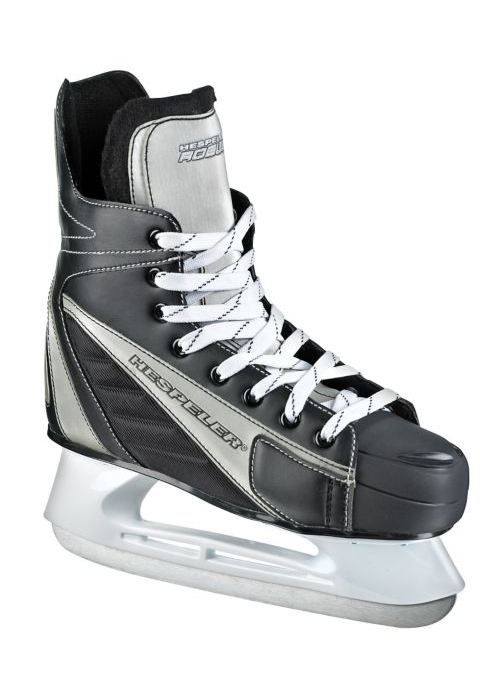
Wearing the proper skates is very important for your child's success in skating. Skaters in CanSkate or Pre-CanSkate can wear either hockey style skates or figure skates. We recommend that you purchase skates that have laces and not clips or dials to tighten. Skates with laces allow for the skate to be better adjusted to fit the child's growing foot. We also DO NOT recommend that you purchase adjustable skates. While this may seem like a cost saving option with a young child that is growing rapidly it is really detrimental to their progress. As you enlarge these type of skates the blade becomes too short for the boot and it causes difficulty for the skater to maintain proper balance and technique. If you have any questions about skates please visit the office during regular hours and someone would be happy to assist you.
Examples of Good Skates:
 .
. 
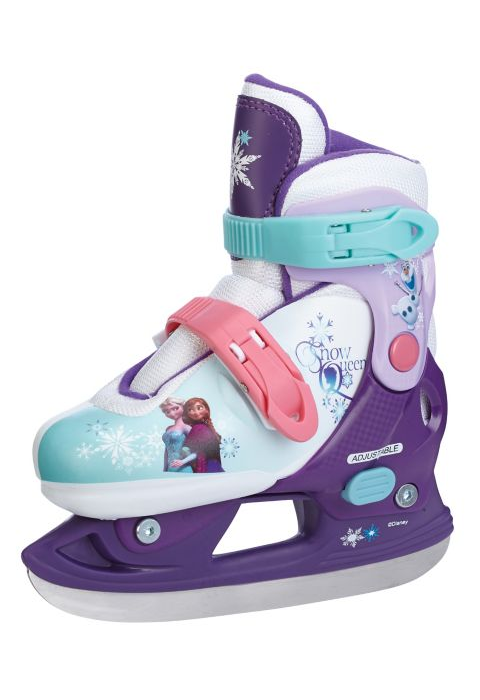
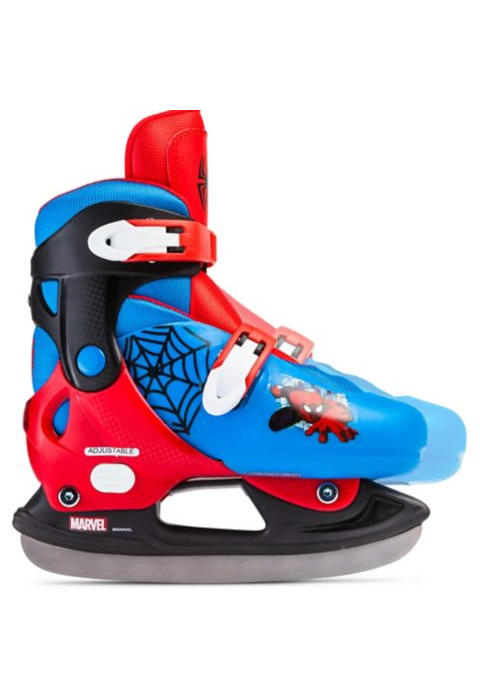
Examples of Bad Skates:
Skate Boots & Blades for StarSkaters
Within a very broad spectrum, as a beginner, it doesn't matter what boots that you have, provided that they are comfortable and fit well. They should be snug in the heels and support the ankles firmly. The most common type of injury in the early stages of skating comes from ankles caving in. Good boots will help your skater to feel confident and help your skating. Bad boot may hinder skating but only by a very small margin. Provided that you aren't in pain and are well supported and comfortable, practice and effort will make a greater difference.
Selecting a New Boot:
Intermediate and advanced boots and blades are sold separately and mounted by the skate shop. Beginner boots may be sold as one unit. Try to avoid those that have the blades riveted to or molded into a plastic sole. For adults, the boot should fit snuggly on your feet so the tips of your toes just brush or can stretch to reach the toe of the boot. Good quality beginner boots are moderately stiff to provide adequate support and the more advanced boots get increasingly stiffer.
The advantages of stiff boots is that they may last many years and provide a good support. their disadvantage is that they have a long and perhaps painful break-in period and they are more expensive. If you buy "too much" skate you may find them virtually impossible to break in. Lighter boots, on the other hand, are more comfortable and break in faster. However, they wear out faster.
Before choosing boots, here is a checklist of some questions to ask yourself. Your next boots are dependent on how you answer these questions:
- How much do you enjoy skating? Do you feel that in time you will be skating daily or is it something that you just want to do once a week or so?
- How long do you see yourself skating? Do you think that you have found a sport that will keep you happily exercising for the next 20 years?
- What are your future expectations? Many skaters who initially can't imagine ever doing a three-turn, progress farther than they ever imagined! What you need to ask is "What are my FANTASIES"? Also, what about ice dance and synchronized skating? Do you have any dreams in those areas?
If you feel that you could easily end up skating every day and you will probably want to skate for the next 20 years and in your deepest darkest heart of hearts, you'd love to skate like Sal?nd Peltier and maybe land a double Salchow, then the cost of your boots will in all likelihood be the LEAST expense that you have to worry about over the next three years. A good boot will probably last that long.
Whatever brand of skating boot that you buy, the most important point is that the boot fits you properly (your foot should be held firmly by the boot) and show first class workmanship. whey trying on boots, wear the same socks/tights that you will skate in. thick socks are not a good idea as they will allow the foot to move in the skate.
The construction of the boot tongue is also important since a relatively stiff padded tongue will stay in place and it keeps the pressure of individual laces injuring your feet. Some tongues have a padded lambs wool lining but tongues of higher level skates are generally padded with a foam rubber. the foam rubber should be about 3/8" - 1/2" thick and fairly stiff with small pores.
It is difficult to compare the size of your boot to the size of your shoe because this varies from one manufacturer to another. Ask to be measure by a competent vendor. they should have you sit and put a little pressure on the measuring board. Try on the boot before the blade is mounted. You may have to try on more than one boot before you find one that fits you properly.
Custom fitted boots are not necessary unless your foot/ankle is shaped unusually or as been injured or you require extra support for your weight or you are doing advanced jumps.
Selecting Used Boots:
First and foremost, the boot must support you. Grasp the boot by the top of the ankle and hold it sideways. If it drops, it will not provide you the ankle support that you need. Don't buy it. Look at the condition of the boot. It should be leather and not plastic or some pseudo leather with a cloth lining. There shouldn't be any cracks or tears in the leather although some creases are fine.
Breaking in Your Boot:
Wear thin socks. You want your socks to slide against the leather. Lace and unlace your skates 3 or 4 times before skating. Skate for short periods of time at first paying special attention to the way that your feet feel and stop if there is chafing or irritation. Never ignore discomfort because it can turn into blisters and infection.
Don't lace your skates to the top at first.
You can get boots "punched out" (stretched) where they're hurting your feet which is in effect customizing them to some degree.
Maintenance of Your Boot:
Boots can be expensive and deserve care. Be sure to dry the entire sole of your boot off immediately after leaving the ice and don't store them in a closed bag to avoid rust. When not in use, always remove them from the skate bag and leave the skates in the open so that the air can thoroughly dry them, otherwise the leather will start to decay. Scratches and nicks in the boots should be attended to before water penetrates the leather.
Waterproofing Your Boot:
Waterproofing should be applied to the entire sole before the blades are mounted and reapplied periodically. If leather gets wet and can't dry out, it starts to rot and then will not hold the blade's screws. A variety of types of waterproofing are available at skate shops. Here are a few ideas:
- A sole enamel can be used. It comes in black and neutral. Depending on the amount of skating that you do, it may need to be reapplied monthly. It will build up and occasionally must be sanded or scraped off to be reapplied.
- A variety of bees wax or similar wax-like products are popular. They are applied then melted in with a hair dryer. Wax must be reapplied more frequently than enamel but is very easy to use. There is no sanding or buildup. After repeated use, the soles may develop a grayish cast.
- Another suggestion is polyurethane varnish that has been thinned down so it soaks into the fresh leather. Applied in many thins coats, it is said to require very little follow-up maintenance.
- Shoe polish is a very effective water-proofer but must be used very regularly.
- It has been mentioned that Harlick applies a waterproofing to new skates at the factory which is very durable.
On white uppers, black streaks can be easily removed with a solvent made for this purpose. Us a buff type liquid polish on white boots. For black boots, use a black liquid or canned shoe polish.
Replugging the Screw Holes:
Every skater should periodically check the screws that hold the blades on to the boot, especially when the skates are new and make sure that they are tight. If a screw is tight and won't stay tight then water is probably getting inside the screw hold and the leather of the sole itself causing the hole(s) to expand and soften. You should bring your skates to a reputable skate shop and have them take the blades off, sand off the top layer of enamel replug the holes re-coat the soles before putting the blades back on. They should put screws in new holes wherever possible.
Try to avoid repeated removal of the screws. The threads of the holes will strip after a few remove/mount cycles. If this happens, you'll have to use different holes.
Lacing:
Getting your skates laced properly will enhance your balance and control and make your skates more comfortable. First, loosen your skate completely and place your heel in the rear when tightening the eyelet area up.
Second, you don't have to tighten all areas to the same tightness.
If you have new skates, you don't have to do the top hooks and you can skip the top hole to make them more comfortable and to start a crease in the leather at the ankle.
Skate Blades

Blades are usually made in 1/4 inch lengths. Blades also have different widths and radii as well as different configurations of the "bulge" (spinning area) and toe picks. These all have major effects on the way that a blade "feels".
Figure skate blades start out as three separate components.
- Toe Plate
- Heel Plate
- Working surface
These are punched out en masse by large presses. The blades are blanked out of long strips of steel which may vary in carbon content dependent on the quality of the particular skate blade that is requested (ie., Majestic would have a lower grade of steel than a Phantom or Patter 99). Regardless, the steel used for all blades hardens to the same standard, however the better grade would keep its edge longer if it was a comparative test.
The blade section is hardened before the three parts are put together to make the skate. this is done in large quantities and hung on a frame and lowered into a high temperature salt bath for a set period of time to be evenly heated. While it is still glowing red, they are quenched in an oil bath. The decrease in temperature causes the steel to harden, however, they are still too brittle to skate on. So, the blades are put into another salt bath of a lower temperature to bring them to 60? on the Rockwell scale. They are then removed from the frame and ground to a set thickness.
The toe and heel plates are then brazed to the blade. Some manufacturers choose silver soldering while other top quality manufacturers choose to hand braze with bronze.
The assembled blade is now chrome plated the profile is ground on and the chrome is removed from the edges by grinding. This is removed so that the hardened steel is what comes in contact with the ice and not chrome. The blades are then inspected and shipped.
Buying New Blades:
The blade length is measured from the front of the sole plate to the back of the heel plate. Measure the length of the sole from toe to heel and fit blades which are 1/4 inch less in length.
Some people believe that they have to buy blades that are expensive in order for their child to become great skaters. Advanced blades require the skater to perfect his/her technique. Top of the line blades are designed for very advanced skaters.
Advanced freestyle blades have a longer radius and have large toe picks. Also the portion of the blade that is used for spinning is much shorter than on intermediate blades. This means that unless you are perfectly balanced and perfectly positioned going into and during the spin then you will start rocking on the blade. Intermediate blades like MK Professional, Coronation Ace etc., provide the skater more "room" to make corrections and continue spinning even if they are slightly off balance.
Just because MK Gold Stars are typically over $500 does not mean that they are automatically better blades than MK Pros or Phantoms. They are all processed in the same fashion. Simply put, certain blades are more expensive because of supply and demand and a few slight design modifications like side honing which makes them slightly more costly to produce.
Buying and Checking Used Blades:
- Look to see how thick the dull strip is on the side of the blades along the edges. Originally, they were 3 or 4 mm when they were new. If they're much thinner than this, then your blades has been sharpened many times. The problem here is that the rocker may be distorted after many sharpenings and it is almost impossible to restore without specialized equipment.
- Put the skate on a level table and check the position of the bottom toe pick. The blade should also be touching the table within 1 or 2 inches of the toe pick. If the blade touches the table further back then it means that the to pick is too low, probably because of too many sharpenings. If the blades touch closer than 1 inch then the master toe pick may have been ground off. In this case the blades will be useless for learning spins and jumps.
- Ask your skate sharpener to look at the blade. They will be able to tell if the blade is straight, incorrectly mounted or damaged beyond repair.
Mounting:
Skates that are improperly mounted can be virtually impossible to skate on. The blade must be correctly positioned and aligned on the boot. To avoid twisting the blade, the boot heel and sole contours must match the blade mounting surfaces. If not, the surfaces can be trimmed with a rasp or shims can be added between the blade and the boot.
Blades are mounted as follows:
- the center of the tip of the sole and heel are found and a line is drawn to join them
- the front of the sole plate of the skate blade is placed in line with the front of the sole of the boot and the skate blade is centered along the line drawn
- screws will be placed only in the slotted holes so that fitting adjustments can occur
Checking for Mounting Problems:
If you are having trouble getting good edges first have the blades checked to make sure that they are straight, properly sharpened and mounted perpendicular to the sole. If the problem persists, have someone watch to see if your blades 'make snow' as you try to skate on the edge in question. If they do this may mean that a mounting problem has occurred which can be corrected by a slight shift of the blade mounting. You will need to tell the person remounting your blades, which edge that you are having problems with.
You can also check if your blades are mounted correctly by yourself but you need to have sharp blades for this test to work effectively...
- find a clean patch of ice
- gather some speed and glide on 2 feet on a straight line. Keep your body upright. Your feet should be directly under your hips. Try this several times backwards and forwards.
- go back and look at the traces to see if the blades are set correctly. You should get a set of double lines for each foot. IF one of the lines is consistently thicker than its mate or if there is only one line, then it means that your weight on that blade falls mainly on the edge tracing that line ie., the blade is unbalanced
- if you are leaning mainly on the inside edge then have the blade shifted to the inside and vice versa. You probably only need a small shift 1 or 2 mm to start with.
Problems with Warping:
Warping may have occurred due to a number of reasons:
- the blade may have shifted sideways slightly when the front or back pair of screws were tightened on the temp mounts, warping the blade from front to back
- the holes for the permanent mounts might not have been positioned perfectly, warping the blade as above
- the heel might not be perfectly level or flat with respect to the front of the boot. Old screw-holes may have created bumps on the heel or the boot might have been manufactured with an uneven heel, twisting the blade.
Rocker:
The rocker is the curve of the blade from toe to heel and is based on the arc of a circle with a given radius. The curve at the front, behind the toe pick is somewhat sharper. It is this difference of curvature which allows you to turn an spin on the front of the blade.
The smaller the radius, the more rocker, therefore you can make turns with less chance of falling. the bigger the radius, the flatter the blade. This will give more speed. When a skater starts learning jumps they find that they need good edge control. Because they have more blade on the ice they can start to prepare their body position for takeoff without falling off the edge so easily.
Grind or Hollow:
This refers to the concave surface on the bottom of a correctly ground blade. A small radius creates edges that will dig deeply into the ice while a larger radius digs in less but glides more freely. A hollow of 5/8" to 3/4" is recommended for beginners and recreational skaters.
The width of the blade should be considered too. A deep hollow with a 3/8" or smaller radius will be UNFORGIVING on freestyle blades unless you are a petite frame. This small radius would be ideal for dance or hockey blades.
A shallow "figure" hollow with a 1" or larger radius will require a more correct lean to prevent skidding and requires more frequent sharpening but it also gives and easy glide and clean tracings.
Maintenance:
There are 2 kinds of blade covers:
- hard rubber/plastic guards
- cloth (usually terry cloth or flannel material) soakers
The plastic guards should be worn any time you step off the ice. Even "safe" rubber mats or carpets accumulate dirt and grit from the shoes of pedestrians and this grit will nick and round off the fine edges of your blades much faster than gliding across the ice. Do not leave them on your skates between sessions as they will trap water and cause your blades to rust.
The cloth soakers are put on after you have removed your skates and after you have wiped them dry with a rag. They protect your blades from bumping in transit and wick away any condensation so your blades won't rust. If you still have problems with rust or want to store your skates then rub a drop of Vaseline Petroleum Jelly along the bottoms of the blades.
Bottom Content Title
This is an additional section to be able to add content